Hey guys! Man. THANK YOU so much for the overwhelming response on the reveal of the Small World room yesterday! (If you haven’t seen it yet check it out here!)
You know I try to post tutorials for everything that I do but friends, a tutorial for this wall treatment just isn’t happening. Not because I don’t think that you can do it, but because I think you TOTALLY CAN!! Let me explain.
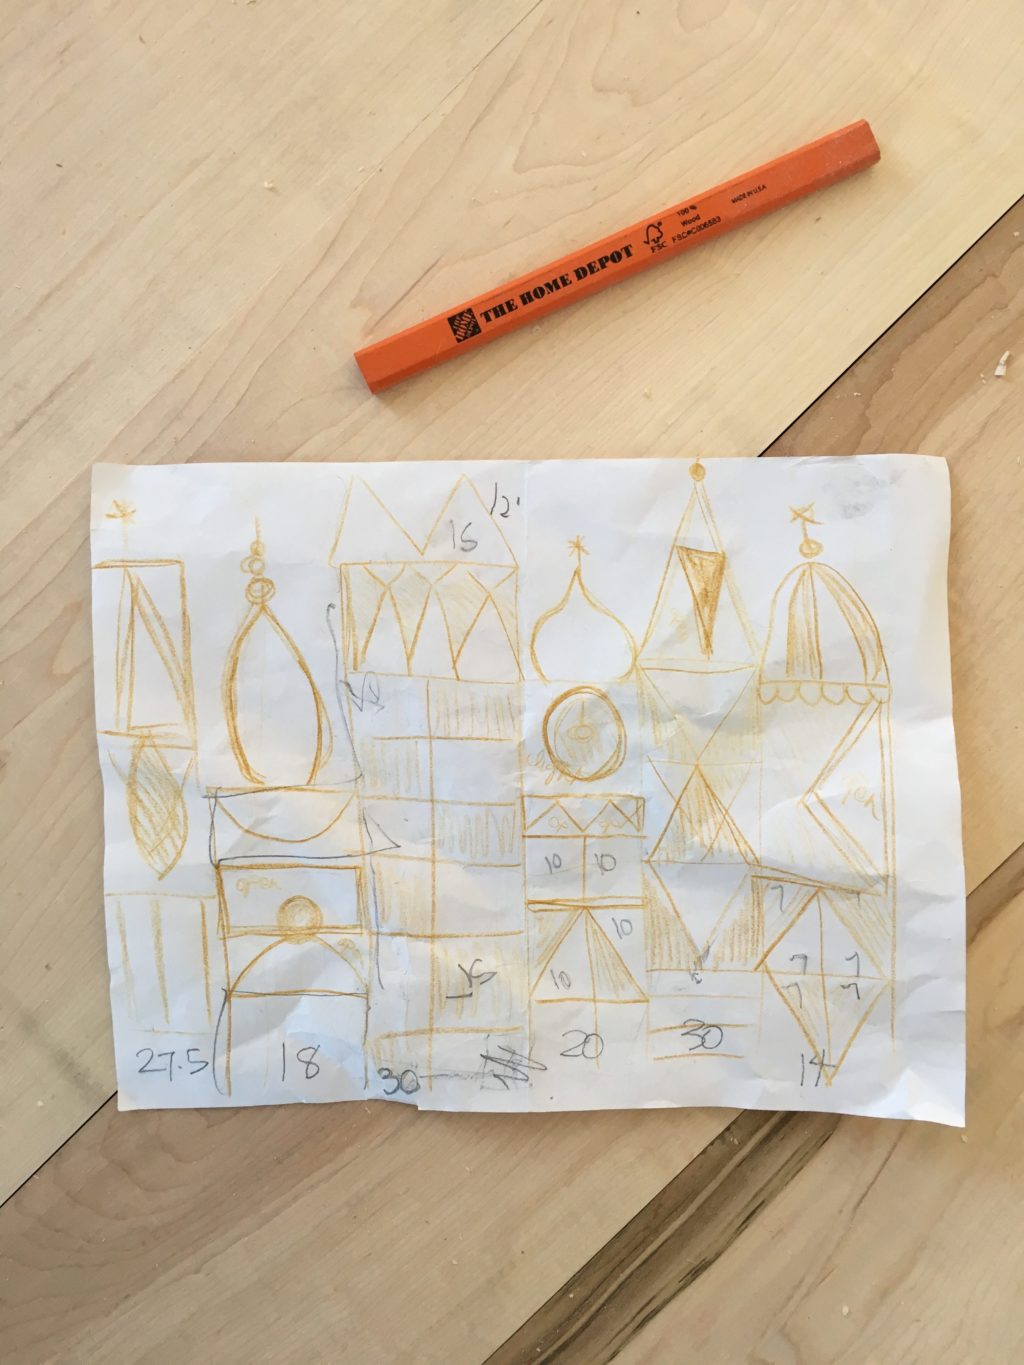
This room started off as a rough (and I mean rough) sketch. There were no measurements or angles or exactness. I knew the general size and the general shape and that was good enough for me. (Court was a little concerned when I pulled out my drawing)
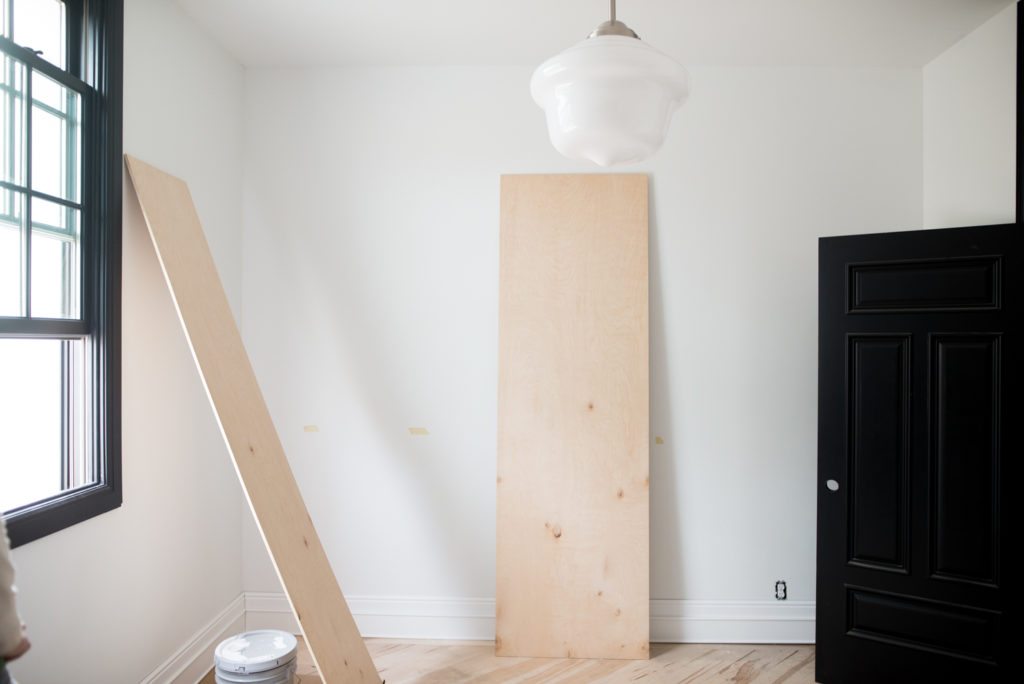
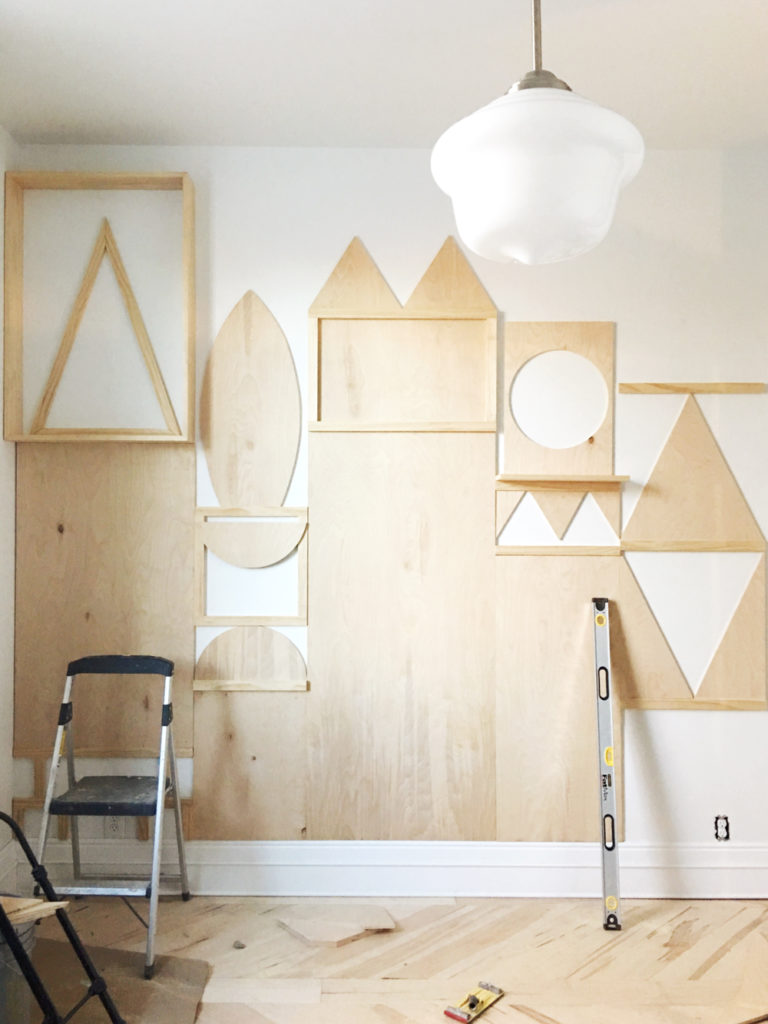
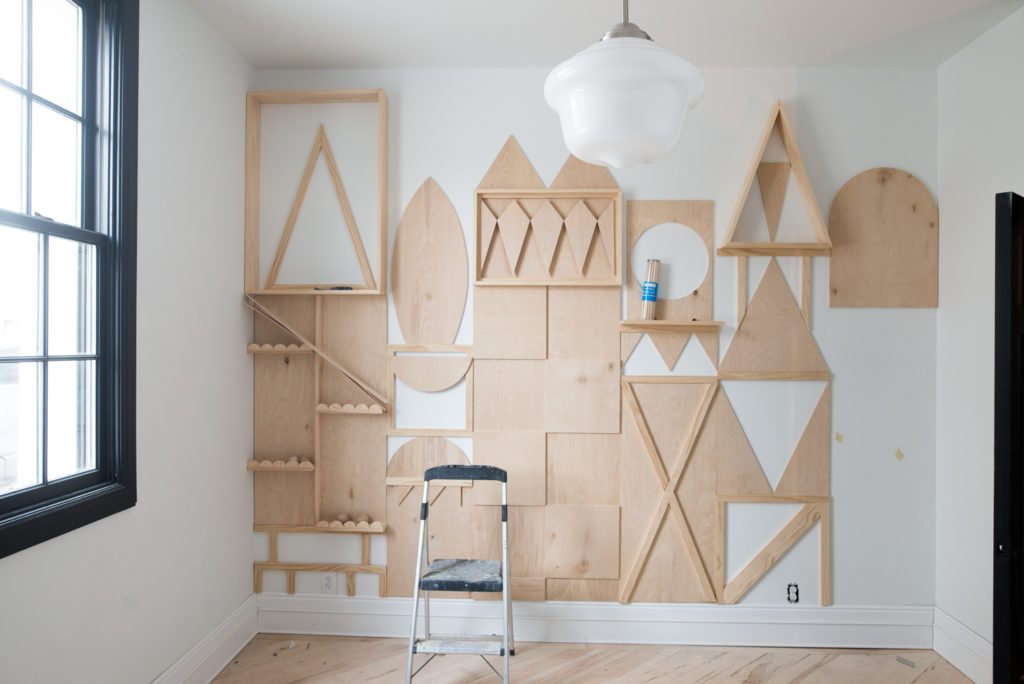
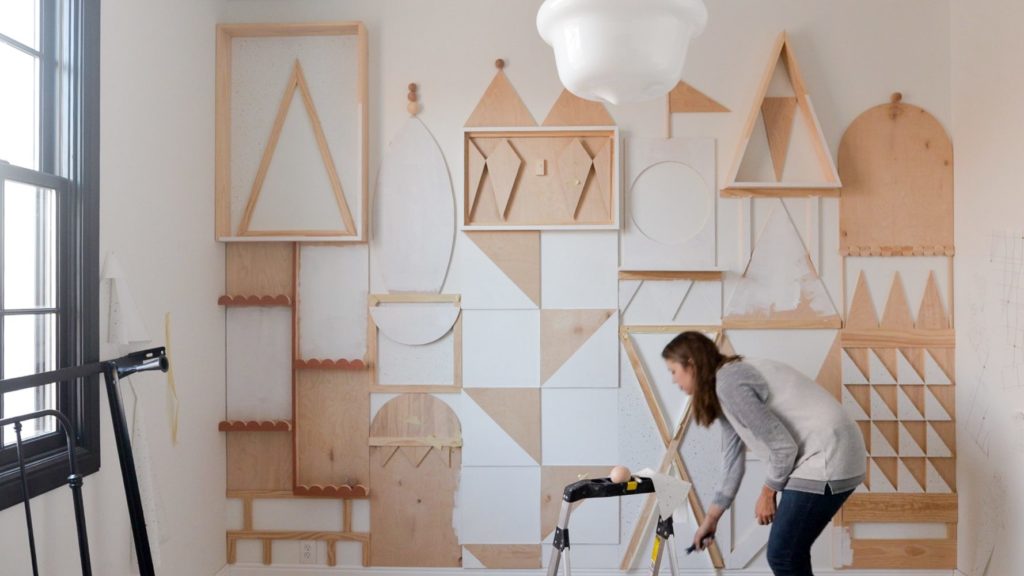
I started off by measuring and marking the size for each building on the wall with tape. Then we got to work ripping pieces of 1/2″ plywood down and started attaching them to the wall (just make sure when you’re doing this that you’re hitting at least one stud!)
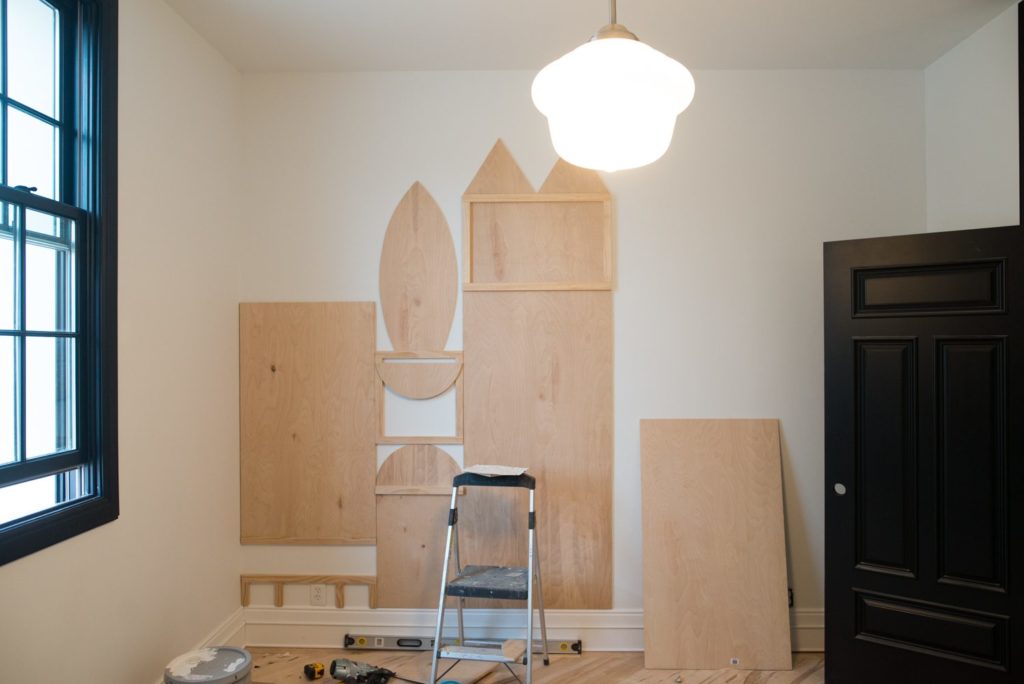
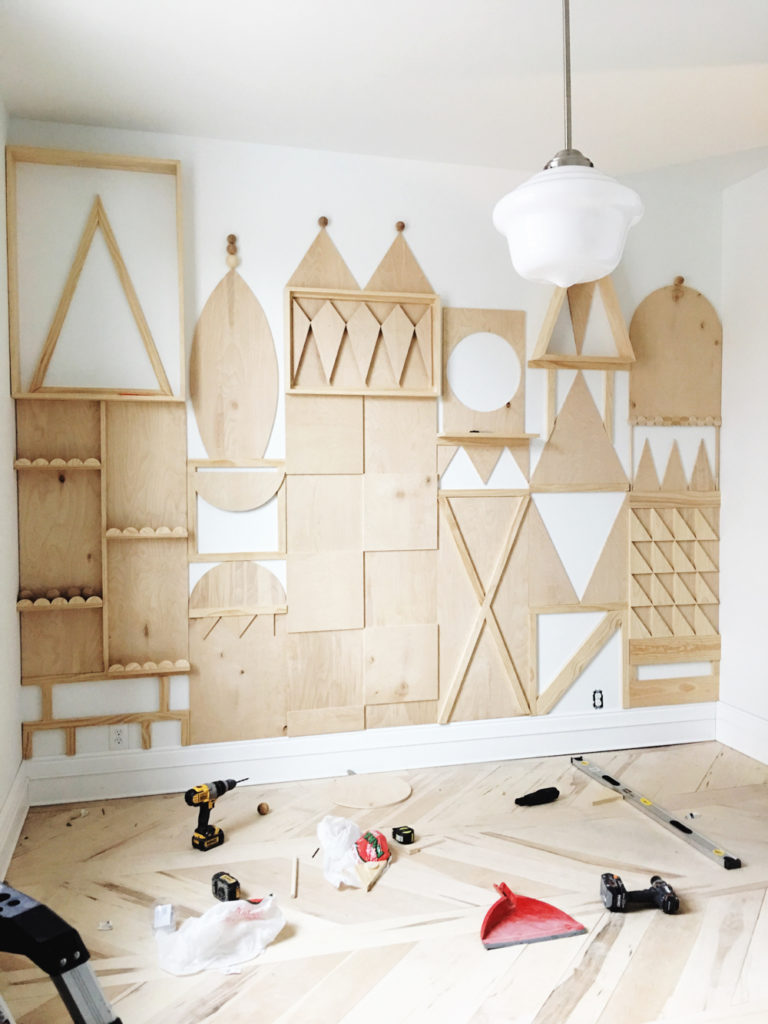
I also used 1×2’s to add detail and dimension. If you’ve ever seen Small World you know that dimension is of most critical importance, everything got layers.
Once the build out was done it was time to pull it all together. This is where I hit a creative roadblock (if you follow my instastories you were a part of this emotional and frustrating part!)
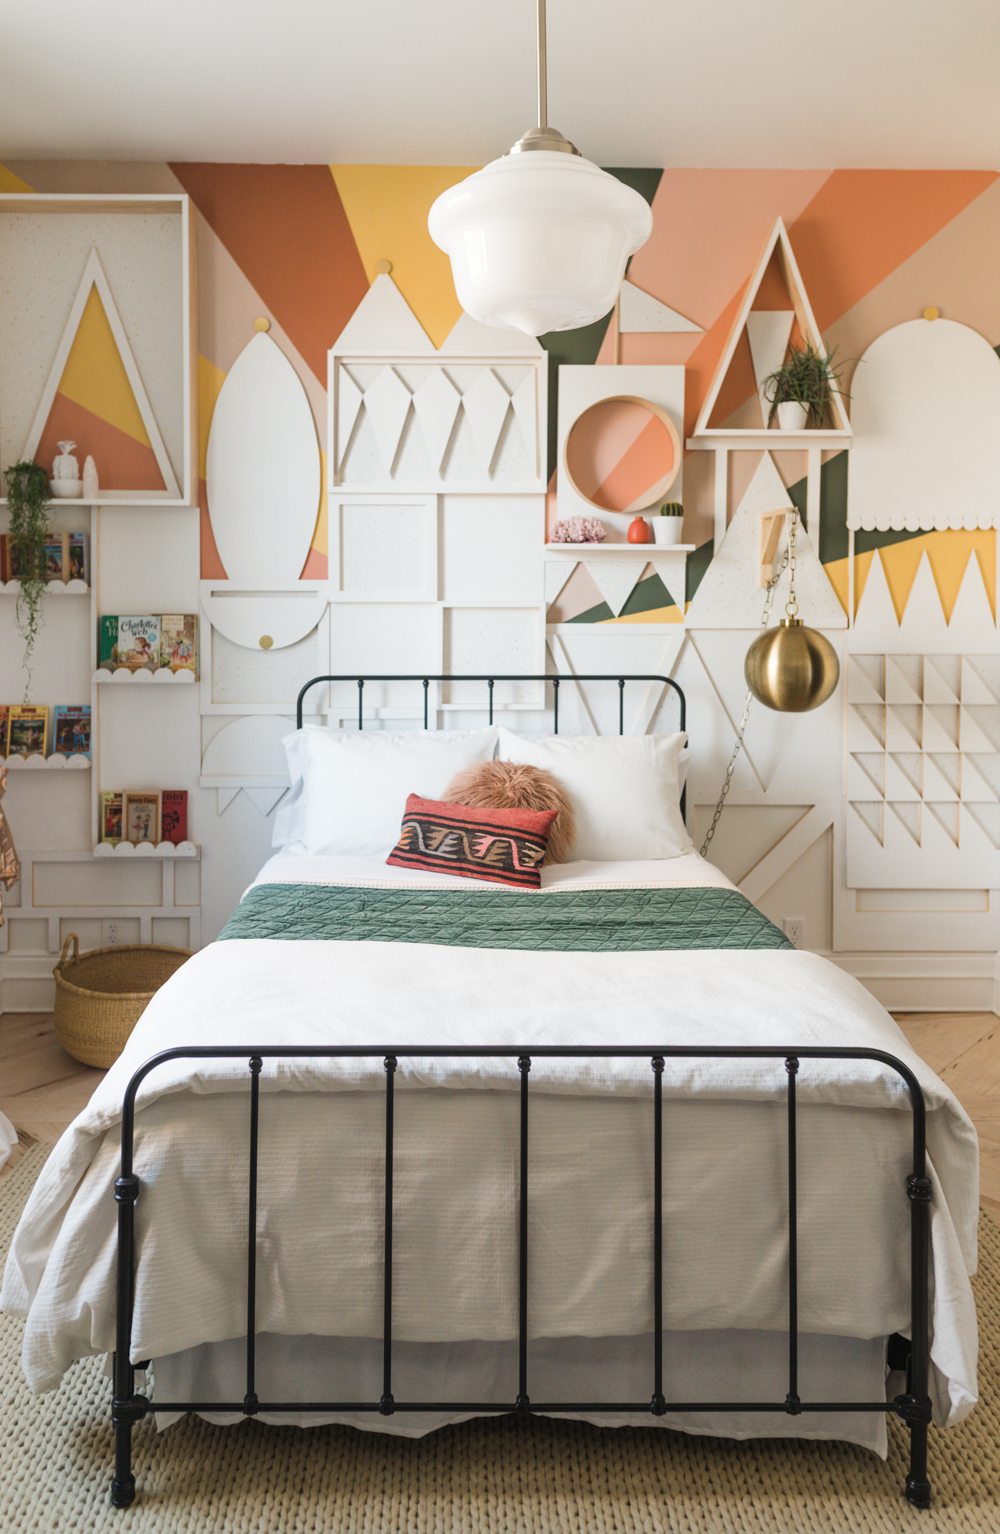
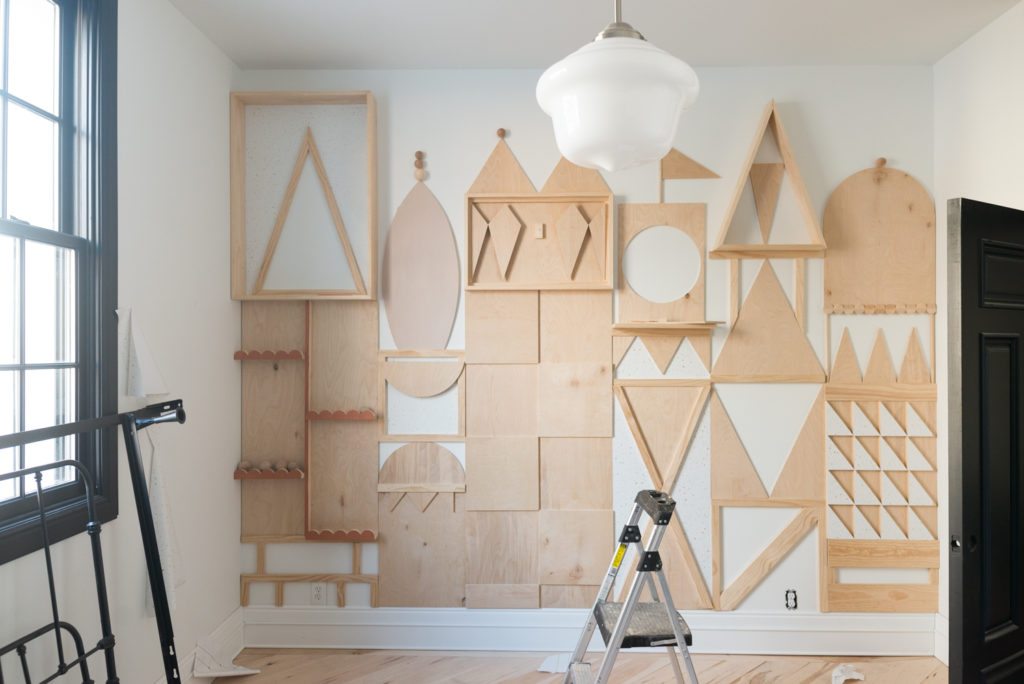
The detail was pretty much done and it was time to start adding wallpaper and paint. The biggest issue that I kept running into is that it was going very juvenile really quickly. I know how that sounds. This is a kids room, I’m using It’s A Small World as inspo. DUH of course its juvenile. But the dilemma is that my daughter is 9 and so I wanted the room to feel more old kid and not nursery. A good dose of whimsical and modern.
I started painting and almost immediately hated it. See I get this feeling in my gut and I know if I’m on the right track or not. It was just too busy with the wood and the wallpaper (even though the paper is white) and the patterns. Again, I know how this sounds. How is it not supposed to be busy?! It just felt like mixing the shapes and the colors and the elevations was just too much.
Oh and did I mention that one of the best things about this type of work is having hard deadlines, and I had to have this room ready for pictures the next day. Not a problem.
So I did what any rational person that hated what was happening would do. I started painting over everything. As I was doing this I was feeling SO conflicted. I love the natural wood, but with the floors and the dresser and the whole vibe I was going for they couldn’t stay natural.
After I had painted everything white I was so gut sick. It just wasn’t working! And now I couldn’t go back (plywood doesn’t sand well). I needed to take a break and walk away from the situation.
Have you ever listened to Elizabeth Gilbert’s TED talk about creative genius? It’s SO AWESOME. Go listen to it right now! For me, creativity is spiritual. Not in a religious sort of way, but in a there-is-something-bigger-that-endows-me-with-ideas sort of way. So I left the Merc, parked my car and started to meditate and pray. It was after about 30 minutes of wrestling with my genius (have you listen to the talk yet?!) that I got the distinct impression that I needed to think bigger than the buildings. When I think of my daughter I see her potenitial as such a light. She literally radiates. So I was picturing her sitting in her bed and the idea of doing these rainbow beams came to my mind, because that is just who she is. As soon as I saw it I knew it was exactly what the space needed.
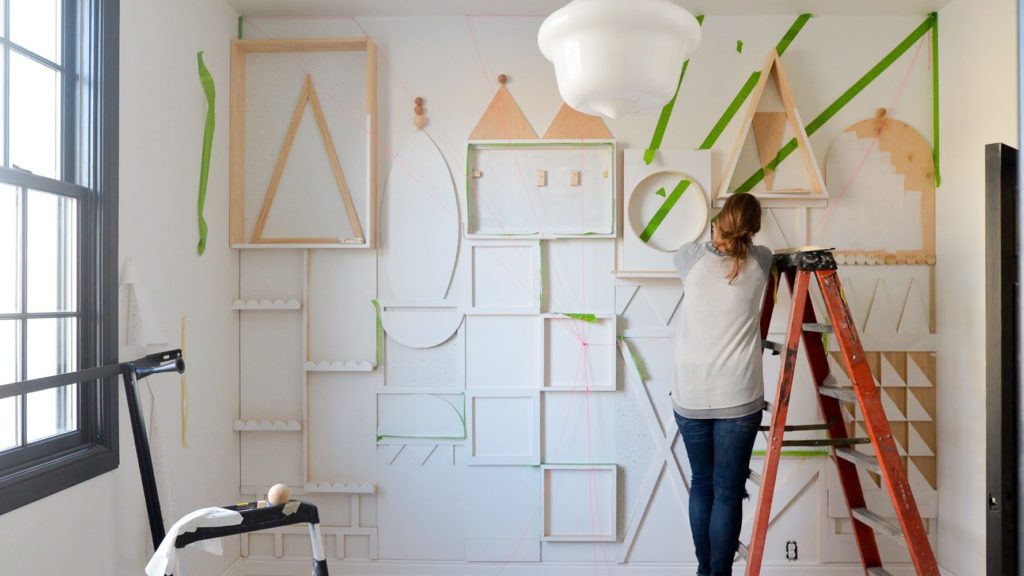
I started measuring and marking the stripes by using masonry line and nails. (You can see the pink masonry line in the picture below, see how it all meets at one central point?)
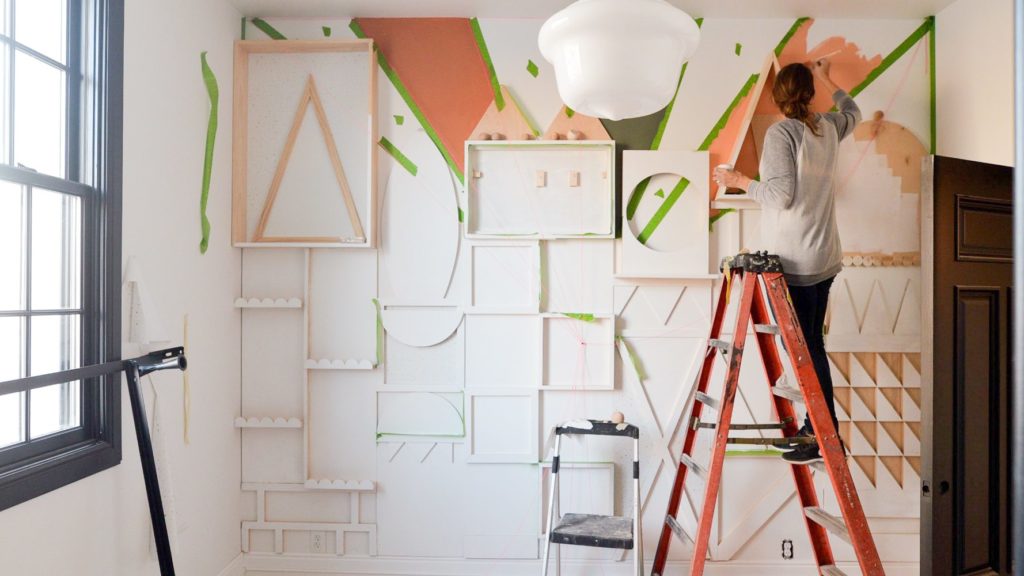
Then I got to painting. I used sample pots (if youre doing an accent wall with sections of color, 9 times out of 10 you can get away with testers and don’t need to buy full size cans.) It will save you so much money!!
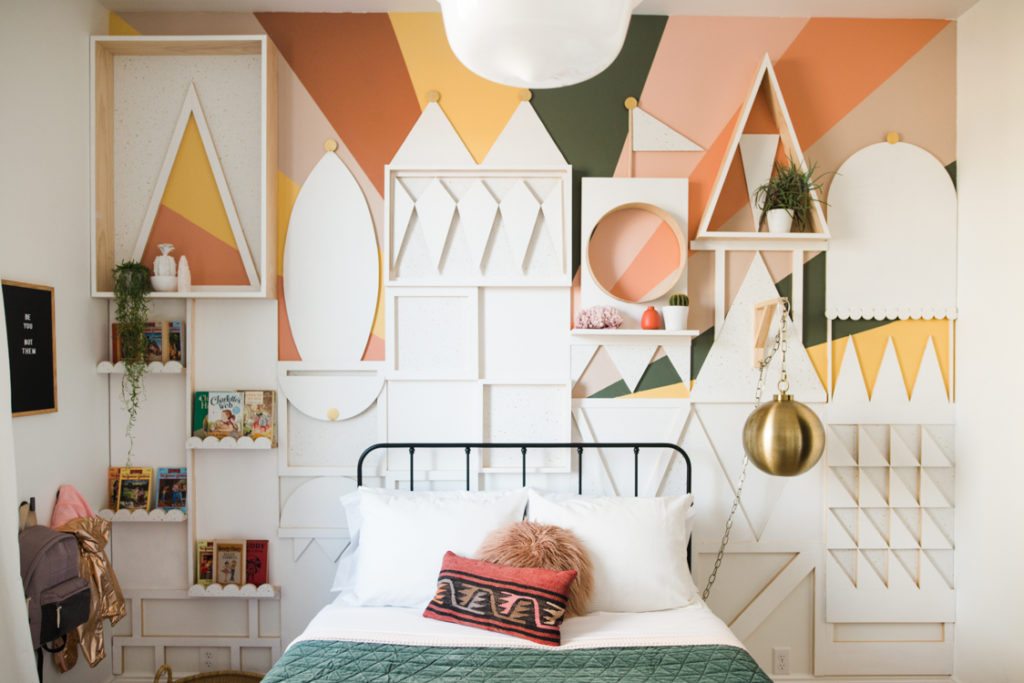
And then voila! we ended up with this!
Check out the video below to see the whole process play out in a time-lapse!!
The post The Process of Creating the Small World Wall + Time-lapse Video appeared first on Vintage Revivals.
via Mandi at The Process of Creating the Small World Wall + Time-lapse Video